Process raw images with Darktable
Many cameras and even smartphones support raw images. Here’s why RAW is awesome for fixing a lack of skill.
Why do this?
- Many cameras and even smartphones support raw images.
- Here’s why RAW is awesome for fixing a lack of skill.
The photos we take don’t always come out as perfectly as we’d wish. With portrait shots, this is usually down to the location of the subject: they may be sitting in front of a bright window, for example, or in a dark room. These situations result in overexposure and underexposure in a digital image – data is either clipped by the brightness or unresolved by the darkness. Fortunately, the RAW image formatted supported by many cameras can save the day. These files contain the raw sensor data from your camera, and this data is typically pre-rasterisation into a format like JPEG and recorded at the full data depth of your sensor.
Install a RAW image editor
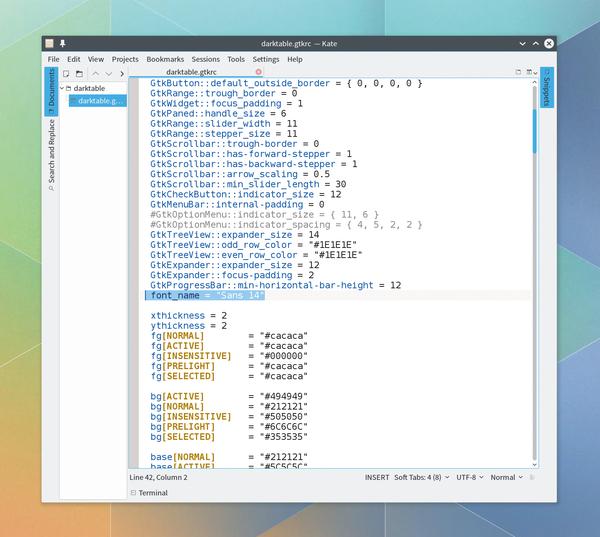
There are a couple of excellent applications for processing raw images in Linux – one is called RawTherapee, while the other is called Darktable. Both RawTherapee and Darktable are capable applications, but we’ve gone with Darktable for this tutorial. It should be easily installed and launched (we’re using version 1.6.4). The only modification we needed to make was to change the default font size for the user interface. There’s no configuration tool within Darktable itself, so you need to copy the folder /usr/share/darktable to
.config in your home directory and edit darktable.gtkrc in a text editor. Look for the font_name property and increase the font size in the double quotes that follow. You could also change the font itself if you prefer something different. We changed the size from 8 to 14, but the best value will depend on your screen.
Import your images
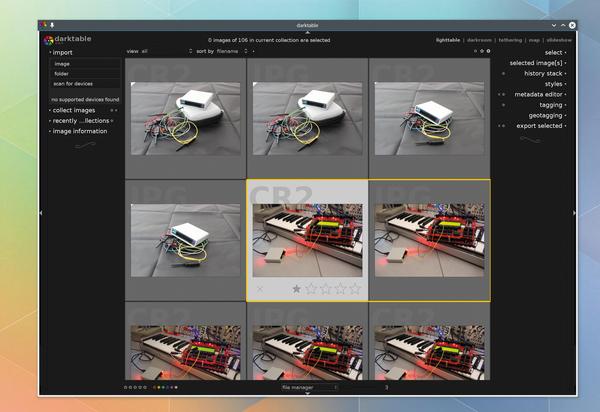
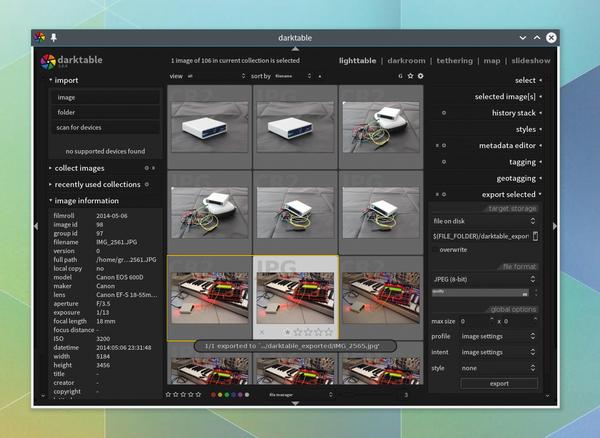
With that minor configuration out of the way, it’s time to play with the application itself. If you’ve used Adobe’s Lightroom or Aftershot Pro, it will feel familiar. The main view is known as a ‘light table’, the virtual equivalent to where an old fashioned photographer would lay their negatives for further selection and processing. RAW files are the digital equivalent to these negatives, and to start, you’ll need to add a folder containing your RAW files (and/or your JPEG files). This can be accomplished from the drop-down menu in the top-right of the main window.
Most cameras will store both JPEG and RAW versions, both of which will display linked with a yellow box when you hover your mouse over one. The formats are also shown on the background of the thumbnail image. Double-click one of your RAW images (ours are from a Canon camera and have the CR2 extension), for further editing.
Explore the user interface
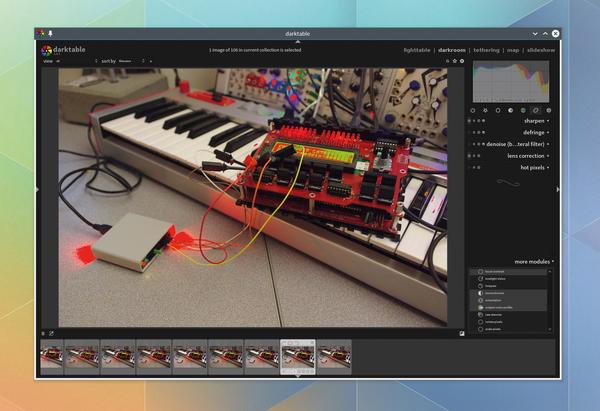
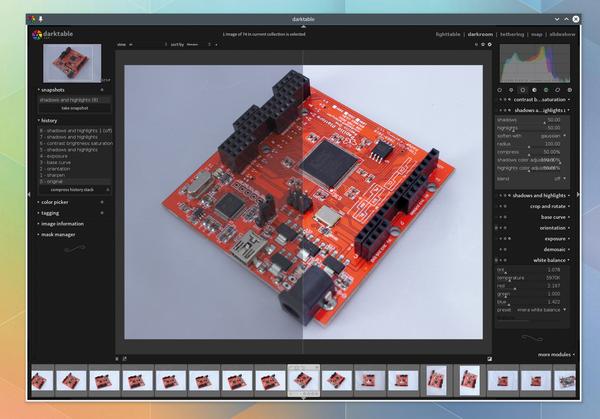
We’re now in ‘dark table’ mode, which is supposedly the virtual equivalent to a photographer’s darkroom. This is where we can make all the adjustments we need. As with any other of the views, you can use Alt and the scroll wheel to change the zoom factor of the image or thumbnails. Each process that you can apply to your image is implemented as a module, and you see these modules grouped into sections on the right. The tiny power symbol buttons next to modules are used to activate and deactivate them.
A module is listed in the first group when it’s enabled, beneath the other tiny power button symbol. Under- and overexposure areas can be highlighted by clicking on the tiny diagonal button in the bottom-right, and you can add many more modules to your palette using the ‘More Modules’ menu in the same corner.
Lens adaption and noise reduction
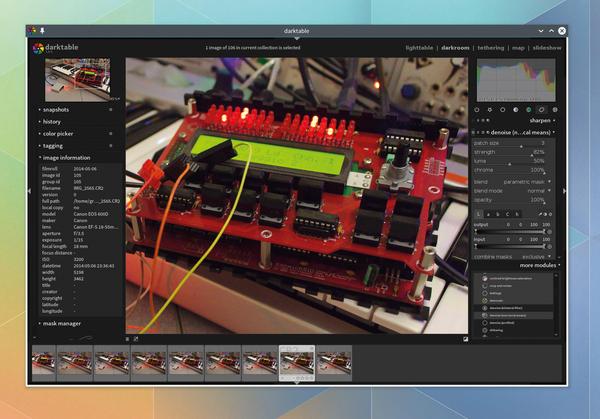
Now it’s time to make a few edits. The first thing we usually do is change the lens profile for the photo. This flattens the curve from the lens and equalises the light and exposure to compensate. This module is listed beneath the correction group, and your camera and lens will need to be listed for the process to work. RAW images can also contain quite a bit of noise, and the best reduction we’ve found is via the module called ‘denoise(non-local mean)’, which needs to be added from the ‘more modules’ list first.
When the module is enabled, use the patch size and strength parameters to edit the amount of reduction and switch the module on and off to check its effect. Hot pixels is another fixing module useful when removing specular highlights, such as a bright and small reflection on an edge or screen.
Exposure settings
Enable the ‘exposure’ module in the basic group and for underexposed images ramp up both the exposure and the black to brighten the image without reducing the contrast. You can bring unseen detail out of an image with the ‘shadows and highlights’ module. Increasing the highlights slider will increase the brightness of whiter elements within an image, and you can use the tiny button labelled ‘multiple instance’ to duplicate each module so you can work on different thresholds within the same image. For easier comparison with pre-edit versions, use the ‘snaptshots’ feature on the left in combination with the history. This will split the view into a ‘before’ and ‘after’ image so you can see what effect you’re having on the final image.
Exporting the image
Darktable is a non-destructive editor, which means it doesn’t change the original photo when you make your edits. That’s why you can roll back through them using the history list. To export an edited image, you need to go back to the light table view that displays the thumbnails of your images. It’s a bit unintuitive at first, but you need to use the newly listed modules on the right to save your images. Use the ‘select’ module to make sure you’ve chosen the image(s) you need, then open the ‘export selected’ module. You can choose a file format, quality settings and profiles (we use JPEG at 100%) as well as changing the save location. Click on export to make it happen and wait a few moments. You’ll be informed when the image has been rendered and saved to your chosen location.

